
Introduction
For this project, you will be creating a page of a Where’s Pauldo book, inspired by the book Where’s Waldo by Martin Handford. Where’s Waldo pages take an image of a man (Waldo) and place him in busy images, and then challenge the reader to find him. A good Where’s Waldo page includes:
- A busy image (including a large number of people) that is clear, and easy to look through.
- An image of Waldo that is placed to scale (his size matches his surroundings)
- Many similar colours to make the image appear more cohesive (complete) and to try and trick the viewer.
In this project, you will be using an image of Mr. Ivison that you will need to cut out using layer masks, and then use tools such as colour correction and filters to help hide him within a crowd. You will then add a title in a font that matches the ‘mood’ of your scene.
Guide
- Start by opening Photoshop and creating a new document that is 8.5×11 inches (standard paper size). Go to File and select New>Blank File. Under the Presets dropdown, select U.S. Paper.
- Before you select your image of Mr. Ivison, start by looking around online for an image to place him in. While you look keep in mind the following requirements:
- The image must include enough detail and things happening to make him difficult to find. While it doesn’t have to include a crowd, this is generally the best approach. Alternatively, think creatively and hide him in a busy location or among a group of other objects or animals.
- The image should be high quality. To find a high quality picture on Bing, go to Filter in the top right of an image search, and set Image Size to Large (or Extra Large). On Google, go to Tools in the top menu, and set the Size to Large.
- When you hide Mr. Ivison, he should be an appropriate scale (size), and will need to have only what you would actually see visible (i.e. he shouldn’t be really small in comparison to everyone, or have his body visible when he’s standing behind someone).
- Finally, you can think creatively. Try to hide him in Phones or in Art. He should still be an appropriate size for these objects.
- If your image is landscape (longer than it is tall), rotate your Photoshop file before continuing.
- Once you find your image, right click and select copy image. Back in Photoshop, go to Edit>Paste to place your image in your page. Resize your image so it fills the page but always resize from the corners so that the image doesn’t look squished or stretched. Some of it may not be visible on your page, but that is okay. Make sure you can see the parts you want to use.
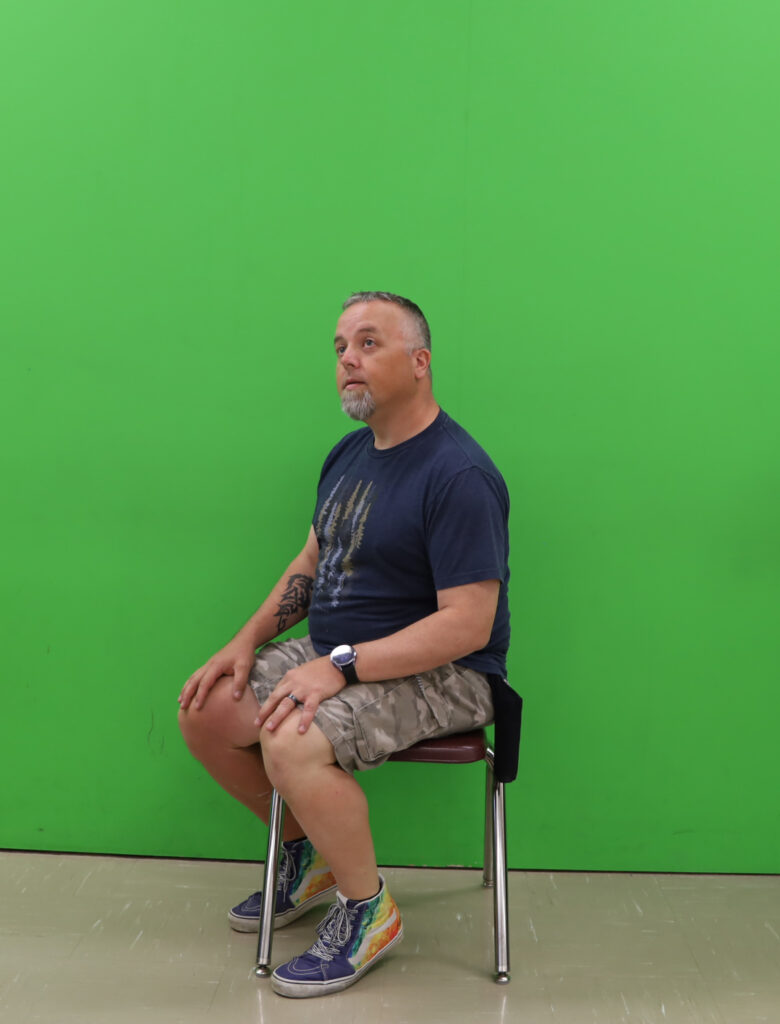
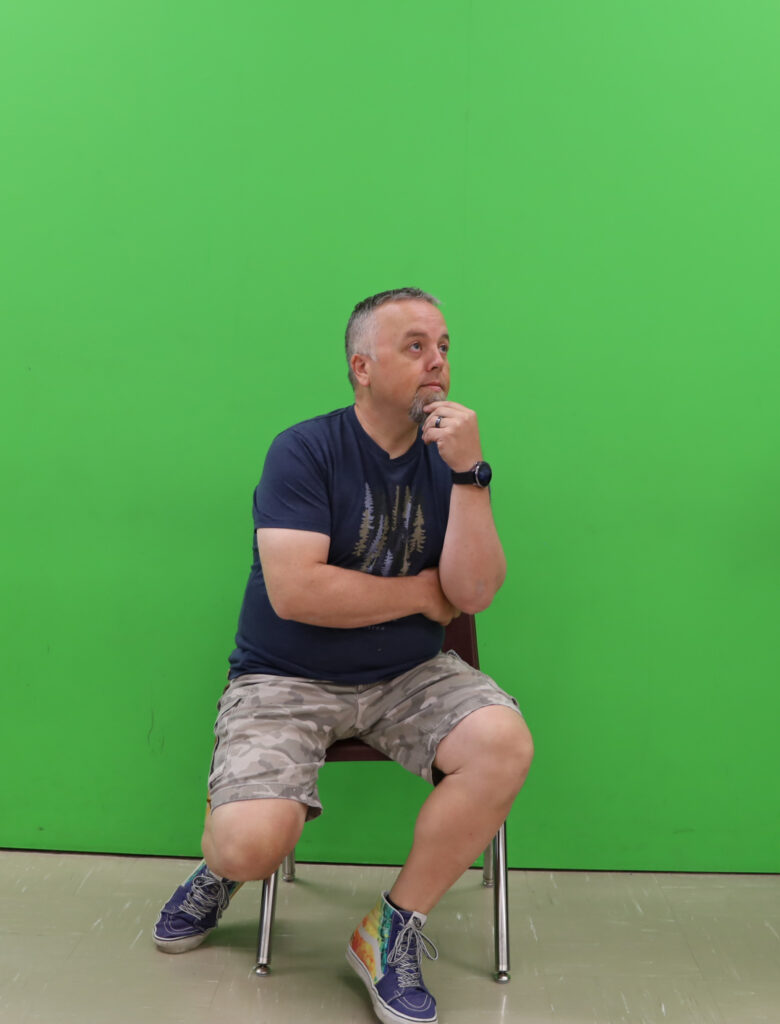
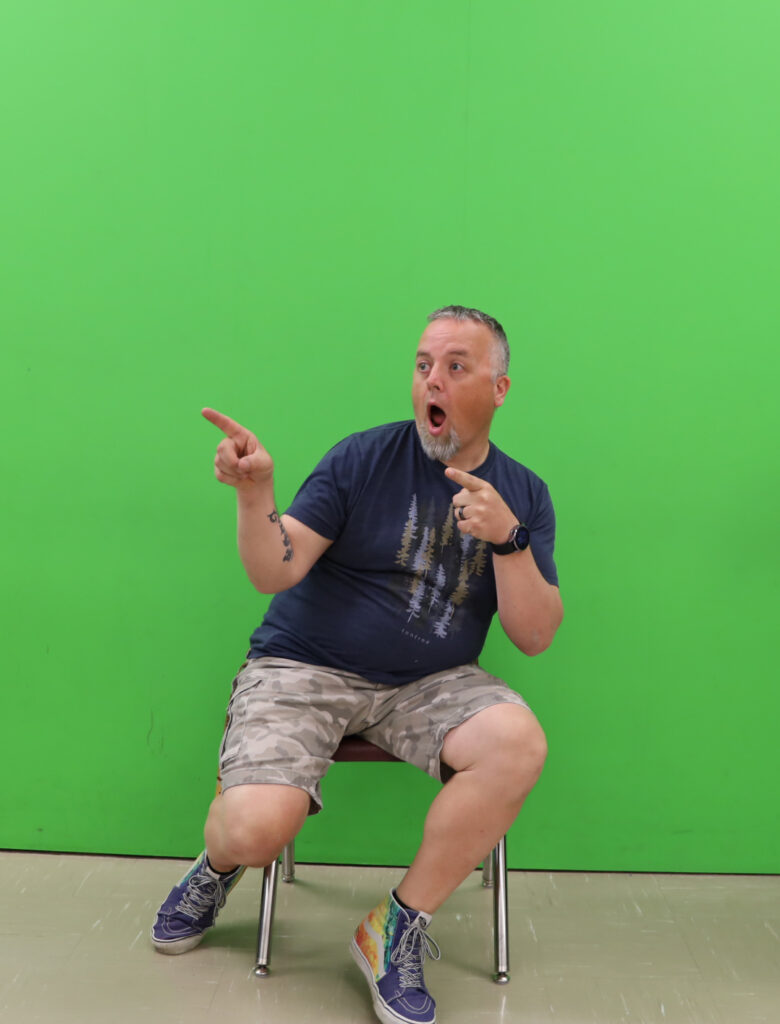
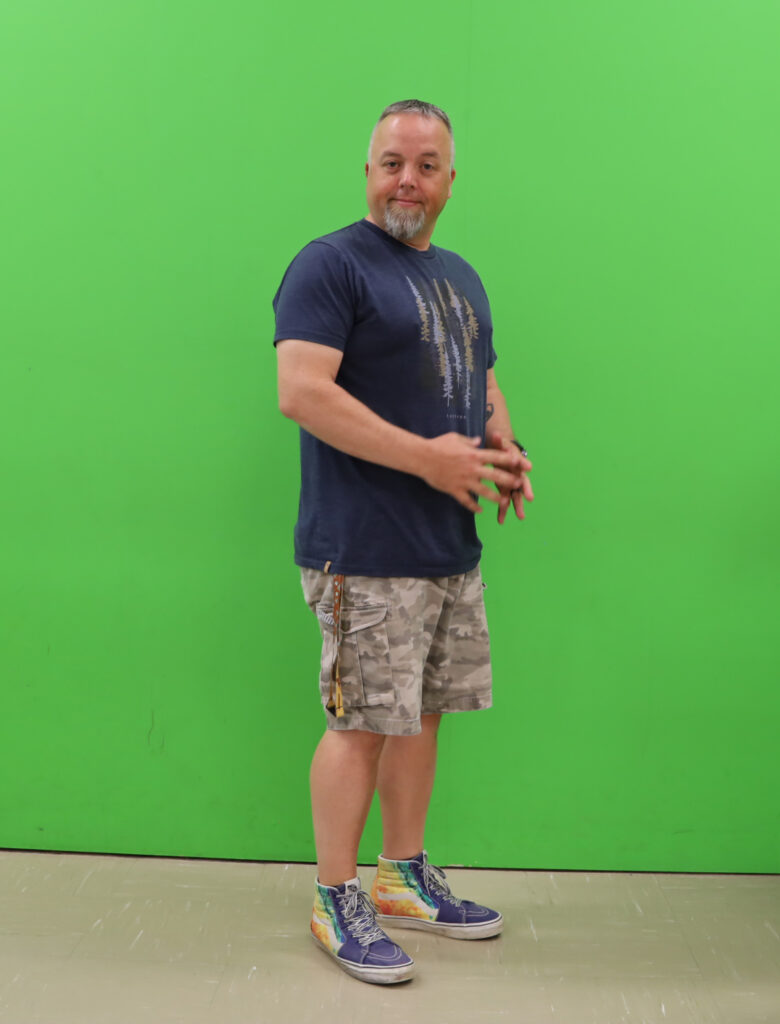
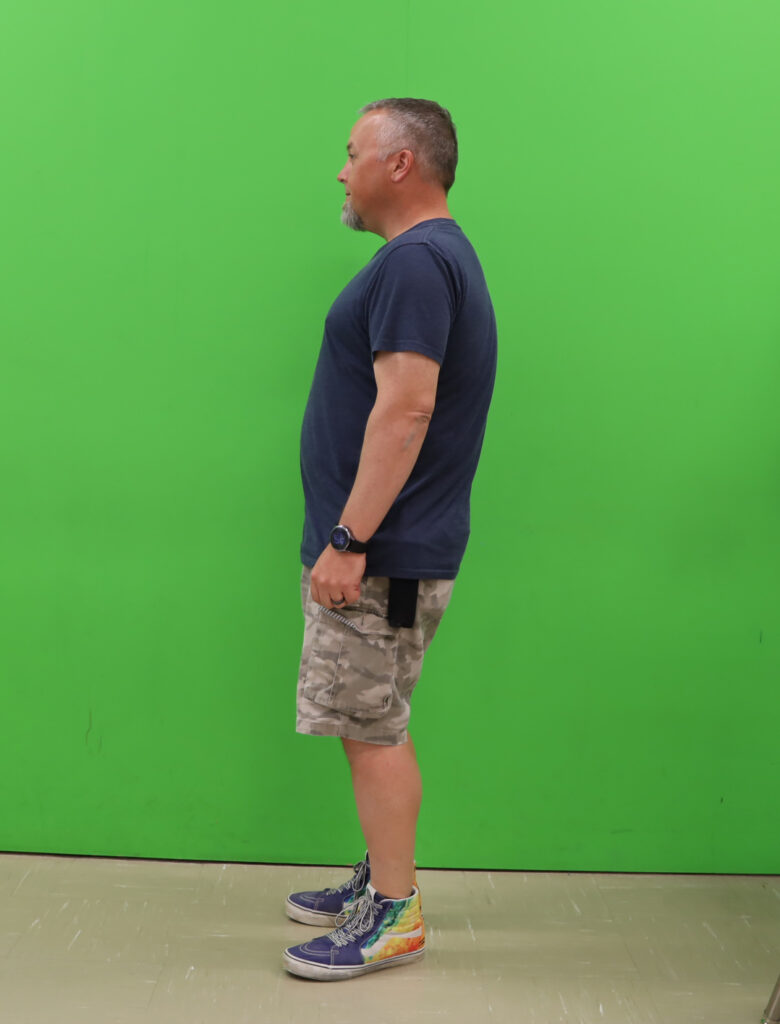
- Now that you have your background, find a picture of Mr. Ivison. Choose one of the following images and Copy/Paste it into your document.


- To cut out a picture of Mr. Ivison, use the Quick Selection Tool in the side menu. Once you select it, click and drag over Mr. Ivison to select him. You do not have to drag right to the edge, but Photoshop should do a good job of figuring out what parts you want to select.
- Your quick selection will probably grab some parts of the background. To fix this, you can hold alt and click and drag over the parts you don’t want. Release tab to start adding to your selection
- Once you have the image selected, add a layer mask by clicking on the layer mask icon above your layers (the rectangle with the circle).
- Open the Photo Bin in the bottom corner. Click on your background image to have it open on the screen. Then click and drag your image of Mr. Ivison into your crowd. Open the layers, right click on the layer for Mr. Ivison and select simplify layer.
- To get Mr. Ivison into the correct location, lower the opacity to around 50% above your layers. You should now be able to see both him and the background. Move him around and shrink him until you put him somewhere you think looks good.
- Add another layer mask to Mr. Ivison, and colour your layer mask black to hide the parts of Mr. Ivison you wouldn’t see. You may want to make the edge of your brush less fuzzy by selecting Brush Settings in the bottom menu, and dragging the hardness up.
- Do some colour adjustments to your image of Mr. Ivison to help him blend into the scene. To do this, make sure you have your layer of Mr. Ivison selected (the blue border should be around the image, not the layer mask) and use Enhance>Adjust Colour to use either of these tools:
- Replace Colour – this allows you to use the eyedropper to select one colour you want to change. You can drag the fuzziness up and down to select more or fewer similar shades. Then you can adjust the hue (colour group), saturation (colour vibrancy from bright to grey), and brightness (dark to light) to adjust the colours. This is a useful tool to remove green screen remnants.
- Adjust Hue/Saturation – similar to the above tool, but adjusts everything in that layer instead of one colour group.
- Once your image is colour corrected, resized and spaced, you can think about adding filters to help if fit in. You may want to try adding some blur (Filter>Blur>Gaussian Blur) or noise (Filter>Noise>Add Noise) or pixelation to help it better match the image quality.
- Once your image is done, use the text tool to add a title to your page. Try to add a title in a font that matches the mood of your image.
- Hand it in on Teams.
Key Concepts
- Layer Masks – How do we use layer masks to hide parts of images without removing them altogether?
- Colour Correction – How do we adjust colours of an object to make images match?
- Scale – How do we size things to make them fit in with the rest of an image?